
Disclaimer: This post gets fairly technical. If you don't understand parts, I really don't blame you.
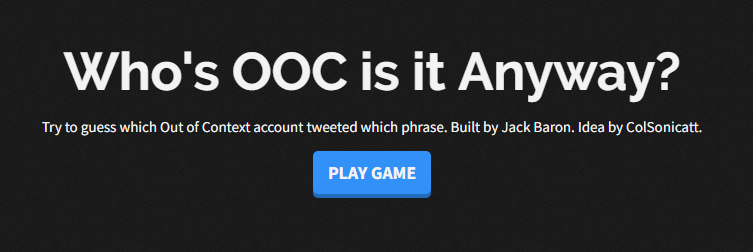
If you've read my previous post on StreamLoop, you'll know that I like to create weird programs. The other day, I reached a point of ultimate boredom and decided to use Twitter to crowdsource ideas of things to make. Thanks to a great suggestion from @ColSonicatt, I decided to make a small game using the many 'Out of Context' Twitter accounts that exist within my friendship circles. Each of these accounts are featured in a List that I manage, so that I can see every tweet in a column on my TweetDeck. This meant I could pull tweets from every one of these accounts then ask the player to guess which account said which thing. With that in mind, here is a semi-detailed breakdown of how it works.
Microservices
If you're not particularly tech-y, that word might mean diddly shit to you. Basically, microservices are a way of splitting one application into smaller parts that all make up the whole. Each part doing a dedicated thing and doing it well. It generally leads to a more manageable project. Why am I telling you this? Because I tend to use this strategy myself when writing code. The game itself is split into two parts (technically three, but we'll get to that later). Firstly, the backend. This is what grabs tweets from Twitter's API and serves them in a specific way that's easier for me to use. And then there is the frontend. This takes data from the backend and works it into a game that the user can interact with. Both parts are separate codebases and are entirely independant of each other, yet both are required for the game to function.
The Backend
This part was fairly simple to implement, and it's where I specialise so it was much easier for me to write. This is usually where I start when writing any website that requires a backend. All I needed from this was a list of tweets, and a list of users. Luckily Twitter's Search API[1] allows you to search all tweets from a list. The list in question being https://twitter.com/JackBaronLP/lists/ooc. All I needed was the search slug, and a Twitter application.
Fortunately it's fairly easy to register an application, and with the correct authentication keys in play, I just needed to manipulate the Twitter search API to list tweets, and to list basic info about each account in the OOC list. The backend is also used to transform the weird data format from Twitter's API into one that's much easier for me to work with. I only need the tweet content and the author ID for each tweet, so I can safely strip out anything else. For the authors, I just need their username and their ID. You can see the backend in action by going straight to here or here and inspecting for yourself.
// Example of a tweet served from the backend
{
  id: "983649965313536000",
  text: "dick sword",
  userID: "782636972703494144"
}
Now that I have a list of tweets and the user they belong to, as well as a list of users to match via user ID, I can start to work this into a game.
Frontend: Logic
This is where the majority of the actual game logic sits. Writing a frontend application from scratch is hard, so I like to use Facebook's React[2] library. React is great because it's a state-based data binding view model framework. Now I know that sounds complicated but it's actually really simple. If you've used HTML before then React will be quite comfortable to you once you learn the basics.
In short, React allows you to take a piece of data, like the current date represented in string form. You can then tell it to put that string somewhere in the HTML DOM and it'll do it. The magic comes when you change the data in your code. React will automatically register that the value has changed, and update it in the HTML. It is also component based, so I can make a template for each part of the game, then plug in the data at a later date. In reality React is quite a lot more complex than that, but hey I'm not delving into that today. I suggest reading up on it if it sounds like your cup of tea.
render () {
  // If the date changes, the HTML will update to reflect that
  return (
    <div>
      The date is { this.state.dateString }
    </div>
  )
}
The first part of the game shows the title screen. Behind the scenes there is an if statement and true/false value in the state to say whether the user has clicked the play button. Once they do, the state flips from false to true, and instead of rendering the title screen, React will render the game instead. At this point, the game loads both the array of tweets and the array of users into memory. If either of these two requests fail, the game falls back onto an error screen instead. Otherwise it shows the first tweet.
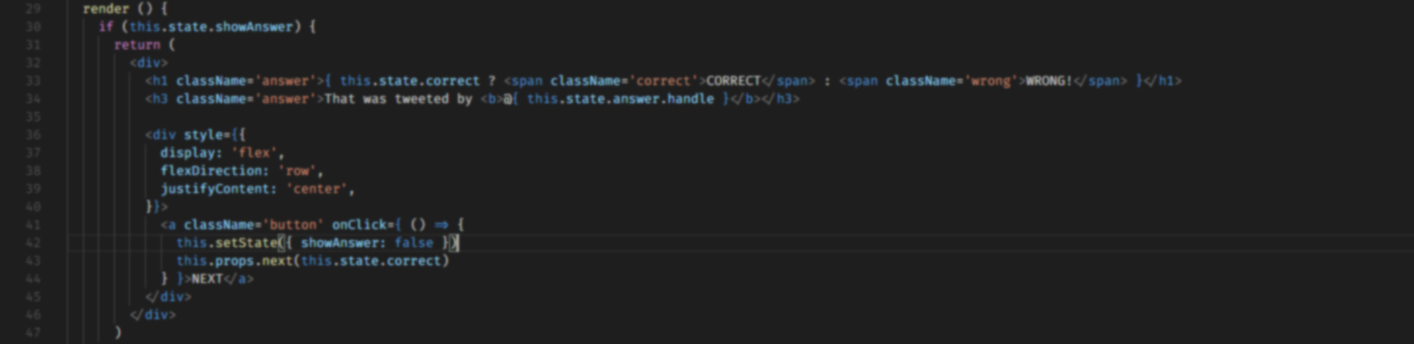
Now the main game is split into two parts, the outer container which holds all the data, and the inner Tweet component that displays the text and buttons for options. The outer component also tracks which tweet out of the list should be shown, and how many correct answers the user has got. Every time the user picks an answer, the current tweet index will increase and if they got it right, so will the score. When the index is equal to the number of tweets, we know that the game is over, and it shows the score instead of the Tweet component.
Inside the Tweet component, we only need data for one Tweet and the list of users. The tweet content is shown at the top, and then multiple buttons are generated based on each user. The buttons display the user's handle and have a callback function that is triggered when the button is clicked. This will show the answer screen, telling the user if they've got it right and shows a button to let the user progress to the next question. The next button will trigger a function on click that tells the outer component to increase the current tweet index, and tells it whether the user got the question right or wrong. React will then re-render the Tweet component with the next tweet.
return (
<div>
<h1>"{this.props.tweet.text}"</h1>
<div className='tweet-options'>
{
this.props.users.map(user =>
<a className='button' key={user.id} onClick={() => this.pickAnswer(user.id)}>
@{ user.handle }
</a>
)
}
</div>
</div>
)
Frontend: Styling
My original prototype was complete once I'd implemented all the logic using React. However this was not enough. I was using default browser styles and it looked ugly. This is where the magic of CSS kicks in. For those unawares, CSS stands for Cascading Style Sheets and is a set of rules that defines how a browser renders content on a webpage. It's often touted as quirky, awkward, and hard to use properly. However in recent times and with the introduction of Flexbox this is no longer accurate.
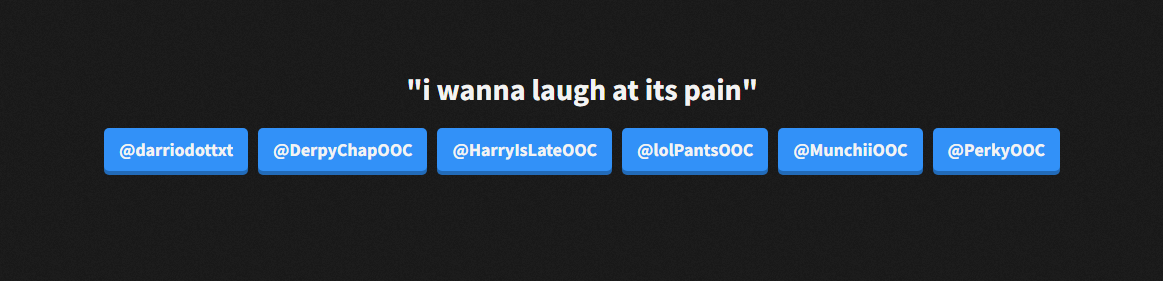
The first modification to the UI was perhaps the most obvious; the shift to a dark theme. Now I much prefer dark themes to websites, as I think it's just easier on the eyes. Fairly simple, just invert the colours. I also added a subtle noise texture to the background; I think it looks nice and makes the page less flat overall. After this. I worked on making it a little more presentable. Centering text on the page and picking a nice font did the trick. Titles are in Raleway[3] and body text is in Source Sans Pro[4].
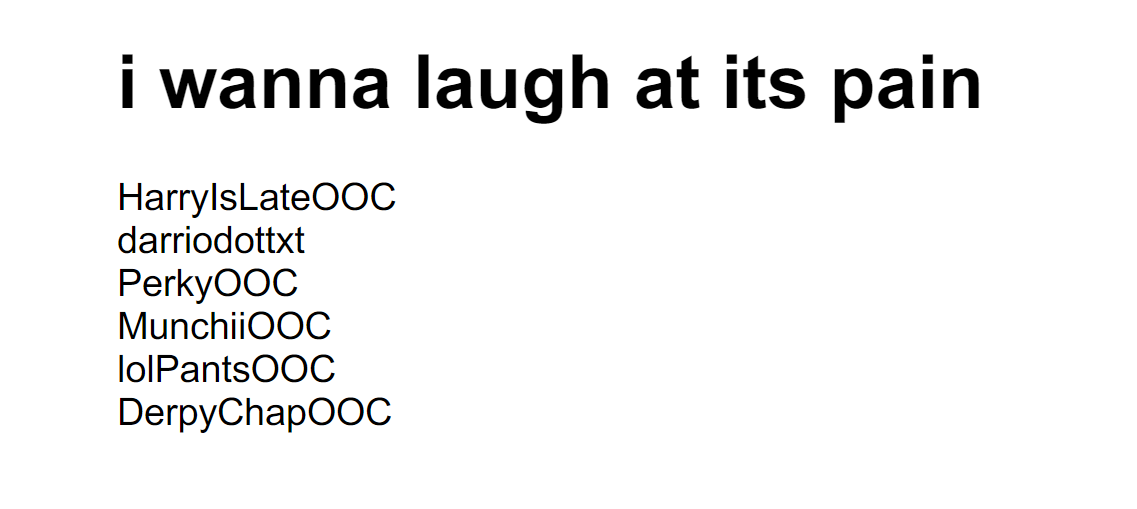
Lastly, and perhaps my favorite change was making the links into buttons. You can see in the original prototype that the options you click on were just text. This looked ugly and wasn't particularly easy to understand. Having clear buttons to click on was a much better way of doing it. I think they turned out quite nicely. Once all the styling was in place, the application was pretty much done.
Deployment
This is the most fun part. Taking the two parts of the application and making them into one service. As with everything I do, I turned to Docker. Docker is a way of isolating code into images, which contain the application code and everything needed to make it run; since it's isolated it eliminates the 'works on my machine' trope and allows it to be deployed anywhere that runs Docker with minimal setup.
Once both the backend and the frontend have been isolated into images, I use docker-compose (a tool for making deployment configuration so much easier) to link them together and expose them on the same port. This is done by using NGINX as an internal reverse proxy and load balancer. This allows me to spin up multiple instances of the either the frontend or the backend if under heavy load and it'll all work fine. Then I just run the service on my server, point my master reverse proxy to the right port, and off we go. The service can then be reached at the correct URL. If at any point I update the code, I just need to rebuild the container images and redeploy. Thankfully docker-compose makes this super easy.
Conclusion
I don't really have a proper conclusion. If you have any questions, or want me to write more breakdowns of various random things I've made in the past, feel free to Tweet me!